

Commercial Espresso Machine Distributors
At Machine Republic, we are dedicated to transforming the way businesses serve coffee. As a leading supplier of commercial coffee machines, we provide state-of-the-art equipment that combines cutting-edge technology with exceptional craftsmanship. Whether you’re a bustling café, a corporate office, or a hospitality business, the machines we supply are designed to deliver the perfect cup every time. With a focus on reliability, ease of use, and superior brewing performance.
The Correct Machine To Suit Your Business
With many types of coffee associated machines/equipment available in a very crowded market place we can help you choose the right piece(s) of equipment to suit your business and budget, So if its a traditional style espresso machine, bean to cup machine, bulk brewing equipment or coffee bean grinders we can offer genuine advice with over 25 years experience in commercial coffee equipment.

Full Packages
Purchasing a machine, grinder, and coffee package offers excellent value, as it include complimentary full onsite services and Pressure Systems Safety Regulation (PSSR) inspections along with free installation and training. These services ensure your equipment runs efficiently and safely, reducing the risk of breakdowns and prolonging the machine’s lifespan. With professional maintenance and compliance with safety regulations, you can enjoy a seamless coffee experience while ensuring a high-quality brew consistently.

Equipment Lease Purchase
Leasing equipment can be a smart, cost-effective solution for businesses looking to access high-quality equipment without the large upfront investment. It allows you to stay up-to-date with the latest technology while preserving cash flow and offering flexibility to upgrade as your needs evolve. Whether you’re starting a new café or expanding operations, leasing provides the opportunity to grow your business efficiently. Roast Republic have partnered Complete Leasing who have a long proven track record within the industry
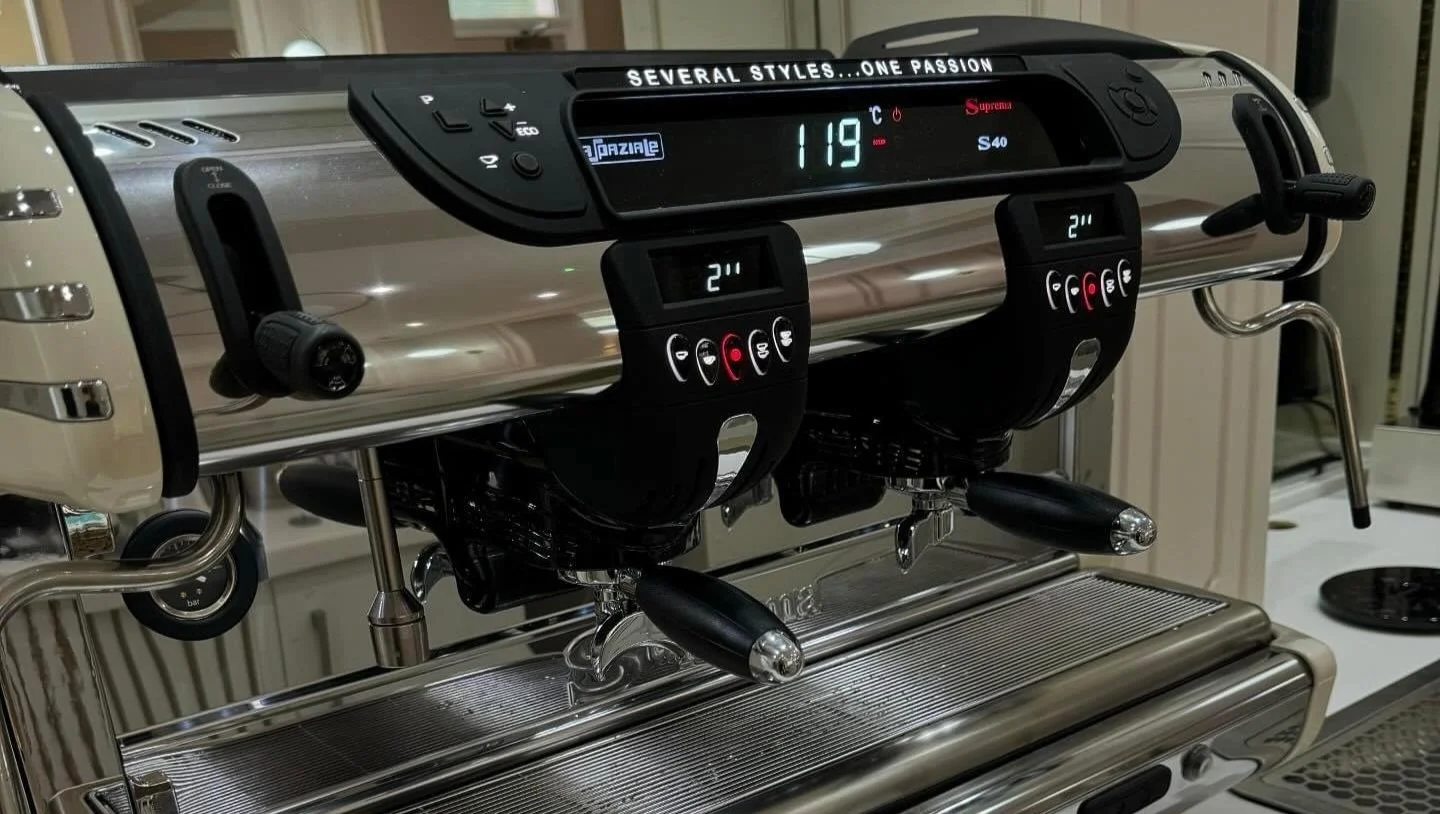
La Spaziale was founded in 1969 by people with an experience in the branch of espresso coffee machines going back to 1947, thus creating a product based on quality and innovation. Today the company still believes in the original concepts by keeping the same philosophy and by committing every day to grant a high quality level in the cup through always advanced technical solutions. The first factory opened in Bologna in 1969 has been expanded and turned later into a new industrial plant of more than 6000 square meters.

S2 from £2250.20 + vat
-
Electronic coffee machine with proportioned dose setting
Built-in pump
Electric heating system
3-liter boiler (for the 1-group machine)
10-liter boiler (for the 2-group machine)
15-liter boiler (for the 3-group machine)Pressure gauge for boiler
and pump pressure control
1 hot water outlet / 2 steam wands
Boiler heating element safety thermostat
Automatic boiler refill
Control of malfunction alarms
Stainless steel body
Gas heating system (2 and 3 groups)
Electric cup warmer (2, 3 groups and SPAZIO)
-
1 Group
2 Group Compact
2 Group Standard
2 Group Takeaway
3 Group Standard
3 Group Takeaway
-
Stainless
White
Black
Side Panel LED Strip

S21 from £3433.24 + vat
-
Electronic coffee machine with proportioned dose setting
Built-in pump
Electric heating system
Pressure gauge for boiler and pump pressure control
1 hot water lance / 2 steam lances with lever taps
Control of malfunction alarms
-
2 Group Compact
2 Group Standard
2 Group Takeaway
3 Group Standard
3 Group Takeaway
-
Black
White

S5 From £2976.38 + vat
-
Electronic coffee machine with automatic dose setting
Electronic boiler refill
Electric heating system
Double pressure gauge for boiler and pump pressure control
Electronic boiler temperature regulation
Boiler temperature indicated by LED display
Automatic operating temperature boost function
Control of malfunctions alarms
Built-in volumetric pump (available on request)
Electric cup warmer (available on request)
Possibility to deactivate the electric heating system
Gas heating system (available on request)
Upgraded boiler heating element (available on request)
Taller cup guard (available on request)
-
1 Group
2 Group Compact
2 Group Compact Takeaway
2 Group Standard
2 Group Takeaway
3 Group Standard
3 Group Takeaway
4 Group Standard
4 Group Takeaway
-
Silver
Red
Black
( side panels only )

S8/S9 from £3605.88 + vat
-
Electronic coffee machine with automatic dose setting
Electronic boiler refill
Electric heating system
Double pressure gauge for boiler pressure control
Double pressure gauge for pump pressure control
1 hot water outlet / 2 steam wands
Electronic boiler temperature regulation
Boiler temperature indicated by LED display
Automatic operating temperature boost function
Control of malfunctions alarms
Built-in volumetric pump
Electric cup warmer available on request
Upgraded boiler heating element available on request
ECO MODE Function
Illumination of cup grid
Preset hot water delivery for infusions
-
2 Group Compact
2 Group Compact Takeaway
2 Group Standard
2 Group Takeaway
3 Group Standard
3 Group Takeaway
4 Group Standard
4 Group Takeaway
-
Silver
Red
Black
( side panels only )

S10 from £
-
Electronic coffee machine with automatic dose setting
Electronic boiler refill
Electric heating system
Pressure gauge for boiler pressure control
Pressure gauge for pump pressure control
1 hot water outlet / 2 steam wands
Electronic boiler temperature control
Boiler temperature visualization on led display
Extraction time visualization on led display for each delivery group
Individual temperature control for each delivery group (ITC)
EGS Function (electronic coffee grounds system)
Operating temperature temporary boost function (UP function)
Visualization and control system for water level in the boiler
Preset hot water delivery for infusions with adjustable temperature
Led lights for drip tray grid
Total coffee counter function
Electric cup warmer with consistent temperature
Control of malfunction alarms
Built-in volumetric pump
-
2 Group Standard
2 Group Takeaway
3 Group Standard
3 Group Takeaway
-
Black
White
Beige
Water Green
Dove Grey

S40 from £6323.13
-
Electronic coffee machine with automatic dose setting
Electronic boiler refill
Electric heating system
Pressure gauge for boiler pressure control
Pressure gauge for pump pressure control
1 hot water outlet / 2 steam wands
Electronic boiler temperature control
Boiler temperature visualization on led display
Extraction time visualization on led display for each delivery group
Individual temperature control for each delivery group (ITC)
EGS Function (electronic coffee grounds system)
Operating temperature temporary boost function (UP function)
Visualization and control system for water level in the boiler
Preset hot water delivery for infusions with adjustable temperature
Led lights for drip tray grid
Total coffee counter function
Electric cup warmer with consistent temperature
Control of malfunction alarms
Built-in volumetric pump
-
2 Group Standard
2 Group Takeaway
3 Group Standard
3 Group Takeaway
4 Group Standard
4 Group Takeaway
-
Red
White
Black
Maroon
La Spaziale Brochure Download
Coffee Bean Grinders
A good commercial coffee bean grinder is essential for any coffee shop or business that serves high-quality coffee. The grinder plays a critical role in determining the flavour, consistency, and overall quality of each cup. By grinding beans fresh for each brew, a commercial-grade grinder ensures maximum flavour extraction, allowing the natural oils and aromas of the coffee to shine. Additionally, precise grind settings allow baristas to tailor the grind size to different brewing methods, from espresso to french press, ensuring consistency and accuracy. A reliable grinder also enhances workflow efficiency, reducing waste and ensuring quick, consistent results even during peak hours. Ultimately, investing in a high-quality commercial grinder is key to maintaining coffee excellence and customer satisfaction.
Zenith Club 65E from £725
-
Hopper capacity: 1.4kg
Grinding speed: 2.7-3.7g/s
Colour: black
Burrs type: 65mm flat
Burrs material: hardened steel
Power: 350w
RPM: 1,310
Dimensions: H: 593 x W: 232 x D 264mm
Weight: 11.8kg
-
Black
Grey
White

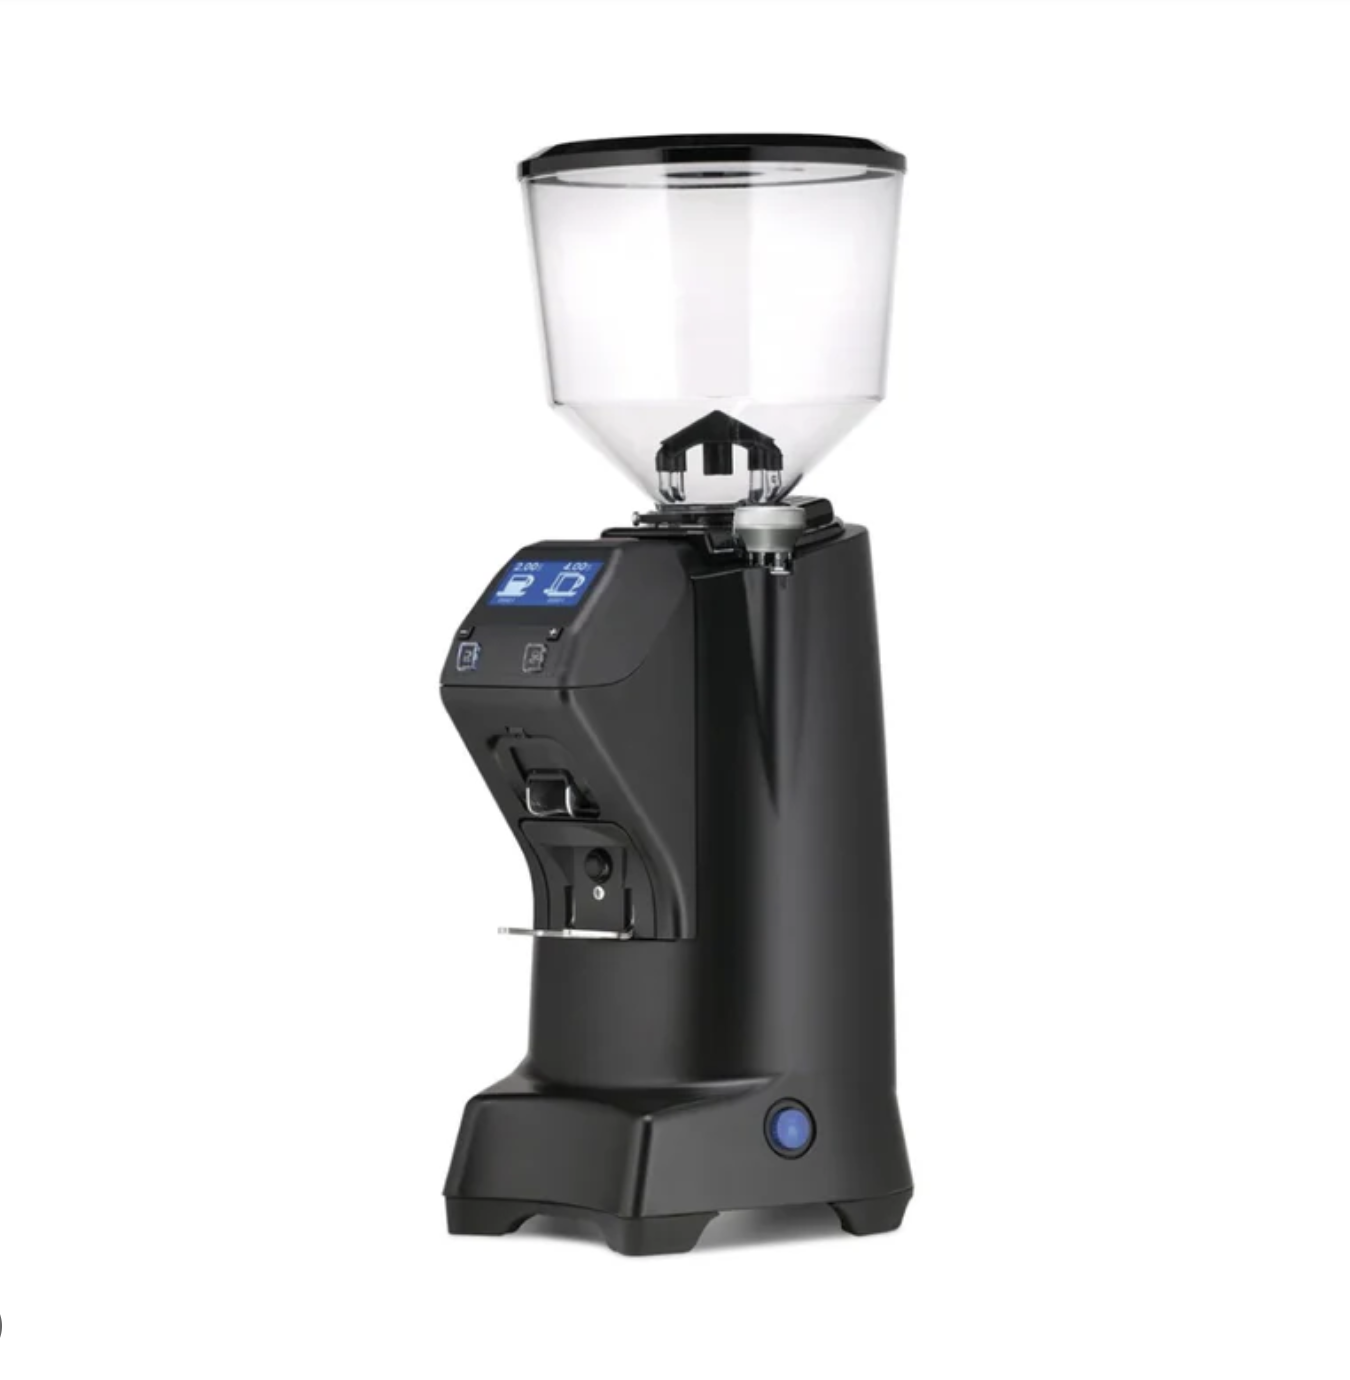
Anfim Practica
-
Hopper capacity: 1.2kg
Burr diameter: 65 mm
Burr material: Hardened steel
Voltage / Frequency / Phase: 220 - 240 / 60 / 1
Max. nominal power: 220 - 240 V drive: 440 W, 100 V drive: 510 W, 110 - 127 V drive: 580 W
RPM: 1400 rpm (50 Hz); 1700 rpm (60 Hz)
Grinding capacity: 4-5 g/s @ 250 µm (50 Hz); 5-6 g/s @ 250 µm (60 Hz)
Bean hopper capacity: 1.2 kg
Dimensions (w x h x d): 195 × 578 × 387 mm
Net weight: 11.2 kg
Shipping weight: 12.7 kg
-
Black
Grey

Mahlkonig E65S GBW
-
65mm burrs
Burr grind life (median setting): ca. 800 kg
Average grinding capacity: 4-6 g/s
Grind-by-Weight technology featuring weight-based dosing
High-precision load cell for real-time weight control during the grinding process
Patented Disc Distance Detection (DDD) enabling accurate settings of the degree of fineness
Time savings and quality assurance through integrated Portafilter Detection
High-resolution 88.3 mm display with a wide viewing angle
Adjustable illuminated spout providing a clean and centered coffee outlet
Active temperature control maintaining low grinding temperatures
Near-silent grinding < 70 dB(A)
Automatic Tampers
The Puqpress automatic tamper is a precision tool designed to streamline the espresso-making process by delivering a consistent, even tamp with minimal effort. Once you place the portafilter under the Puqpress, it automatically applies a perfectly calibrated amount of pressure to the coffee grounds, ensuring an even, level tamp every time. This eliminates the need for manual tamping, reducing the chance of inconsistencies caused by uneven pressure or human error. The Puqpress is adjustable, allowing you to set the desired tamping force for optimal extraction, leading to better espresso shots with improved flavour and crema. It saves time, reduces strain on baristas, and ensures consistent results across every shot.

Puq-Press Mini
-
Net weight: 3.4 KG
Dimensions(DxWxH): 19.5×14.1×28.6cm
Input: 110-240Vac 50-60Hz
Power: 72 W
Plug type: 13amp
Cycle duration: 1.3s
Tamper diameter: 58.0 – 58.3mm
Suitable for: Works with naked, single spout & double spout portafilters
Non-stick coating: Yes
Fine adjustment lower damp: No
Force adjustment: Steps of 1kg in the range from 10 – 30kg
Led lights: Black & White
Warranty - 1 Yea
-
Black
White

Puq-Press Q2
-
Compatibility: Spouted and Naked Portafilters - All Brands
Tamper Sizes: 53mm, 58mm & 58.3mm
Shape: Flat Bottom
Pressure: 10-30kg (+/- 1kg)
Cycle Duration: 1.3 Seconds
Cable Length: 2.5m Power Cable
Power: 60W
Dimensions: 125mm (L) x 150mm (W) x 220mm (H)
Weight: 4.8kg
Warranty: 100,000 Cycles or 1 Year
-
Black
White

Puq-Press M3 Mahlkonig
-
Designed specifically for the latest Mahlkonig E80 Supreme grinder.
Perfect workflow from top to bottom flow.
No space required as sits under the grinder.
More precise shots with reduced channelling and improved flavour.
Consistency between every Barista.
Speeds up the workflow – calm baristas and happy customers.
Industry proven technology.
No RSI issues.Product Features:
Nano non-stick tamp head reduces coffee build up.
New advanced stiffer frame provides further precision and life span.
New easy adjustment wheel simplifies correct setup.
The new updated design now works perfectly with naked portafilters.
Force adjustment: steps of 1kg in the range of 5-30kg
Suitable for all types of portafilters, naked, single and double
Cycle duration: 1.3s
Warranty: 2 years
Hot Water & Filter Machines
We supply a wide range of hot water boilers, filter machines and coffee brewers and accessories from leading brands. Whether you’re a café owner looking to deliver exceptional brews or a larger organisation with high volume coffee output in a short space of time, high quality brewers ensures you get the best in flavor and performance. Ensuring quality and customer satisfaction, they make brewing the perfect cup of coffee easier than ever.
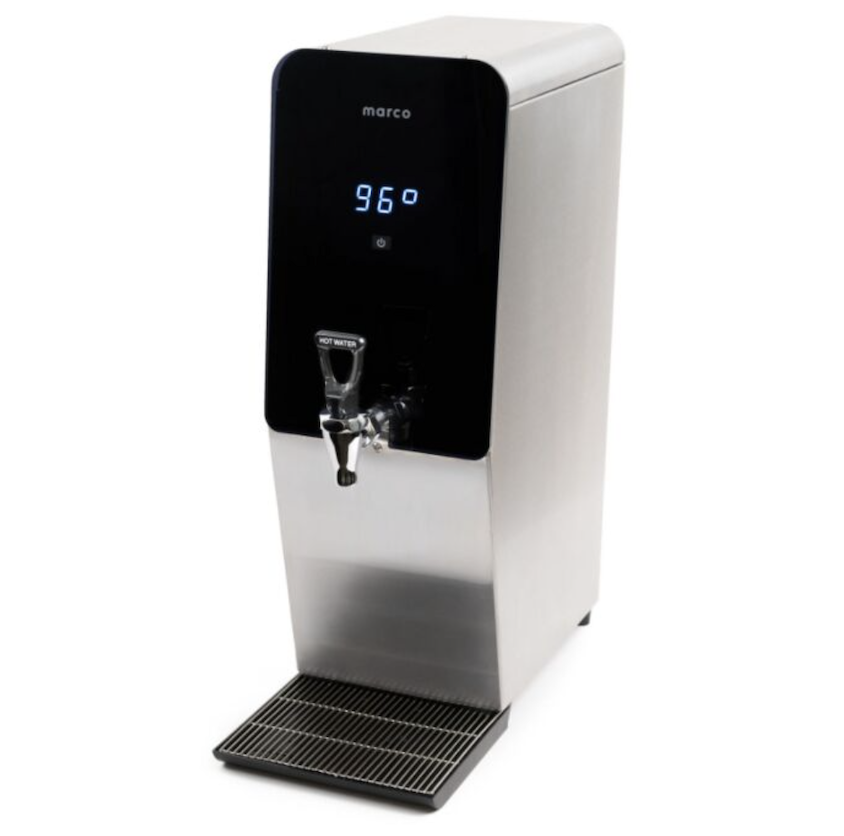
Hot Water Boilers

Counter Top Filter Machines
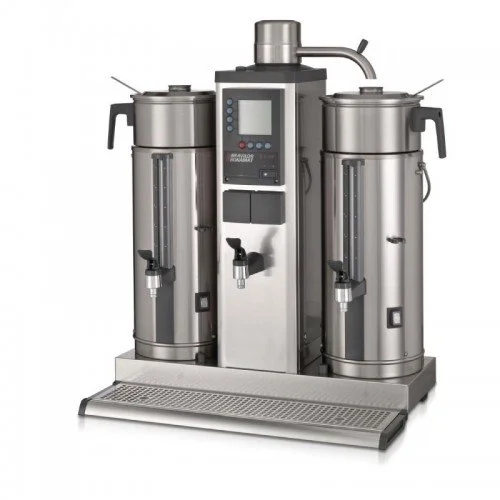
Bulk Brew Equipment
Barista Equipment & Cafe Essentials
Baristas use the correct tools to perfect their craft because precision is key to consistently producing high-quality coffee. Each tool—whether it’s a thermometer, tamper, or scale this ensures control over variables like grind size, water temperature, and extraction time, all of which directly impact the flavor, texture, and aroma of the coffee. Using the right tools allows baristas to fine-tune each cup to meet exact standards, ensuring consistency, efficiency, and a superior customer experience. Ultimately, these tools enable them to elevate their skills and craft the perfect cup every time.

Barista Equipment
-
Kits
Knock Boxes & Tubs
Milk Foaming Jugs
Scales & Timers
Shakes
Shot Glasses & Vessels
Spoons For Measuring
Stencils
Tampers
Tamping Mats
Tamper Seats & Stands
Thermometers
Towels & Cloths
Whisks & Spatulas

Cafe Essentials
-
Cups, Saucers & Mugs
Coffee & Tea Storage
Dispensers
Drinks Blenders & Mixers
Espresso Machine Accessories
Glassware
Pitcher Rinsers
Syrup Racks & Pourers
Teapots & Tea Accessories

Cleaning Products
-
Automatic Machine Cleaners
Brushes
Cleaners for Filter & Bulk Brew
Cloths
Descalers
Espresso Machine Cleaners
Grinder Cleaning
Organic Cleaning
How To Guides
Here are some easy guides to help you craft the perfect cup of coffee, whether you’re a beginner or a seasoned coffee enthusiast. From selecting the right beans and grind size to mastering brewing techniques and water temperature, these tips will elevate your coffee game. With these simple, practical guides, you’ll be able to create a rich, flavorful cup of coffee every time.

Steaming Milk
-
Foaming milk for a latte and a cappuccino involves slightly different techniques, as these drinks require different textures of milk. Here’s a guide to help you create the perfect foam for both:
1. Understanding the Difference Between Latte and Cappuccino Milk
• Cappuccino: Requires a thicker, more airy foam with a foam-to-milk ratio of roughly 1:1. The foam should be light and fluffy.
• Latte: Requires velvety microfoam, which is a thinner, creamier milk texture with a foam-to-milk ratio closer to 1:3. The foam should be smooth, with tiny bubbles that create a glossy finish.
2. Step-by-Step Guide for Foaming Milk for a Cappuccino
1. Pour Cold Milk into a Pitcher
• Use whole milk for the best results (or a non-dairy alternative). Fill the pitcher one-third to halfway full, allowing space for the milk to expand as you foam it.
2. Position the Steam Wand
• Insert the steam wand just below the surface of the milk. Hold the pitcher at a slight angle to create a whirlpool effect.
3. Introduce Air (Stretching the Milk)
• Turn on the steam wand fully and lower the pitcher slightly so the tip of the wand is just below the milk’s surface. You should hear a gentle hissing sound as air is introduced into the milk. Continue this for about 3-5 seconds, or until the milk volume increases by 30-50%.
4. Submerge the Wand (Texturising)
• After stretching, raise the pitcher so the steam wand is fully submerged in the milk. This stops air intake and helps to create a smooth, velvety foam.
• Keep the milk swirling to break down larger bubbles and improve texture.
5. Heat the Milk to the Right Temperature
• Heat the milk to 60-65°C (140-150°F), or until the pitcher becomes too hot to touch for more than a second.
6. Finish and Pour
• Tap the pitcher on the counter to remove large bubbles, then swirl the milk for a smooth texture.
• Pour the milk over your espresso, starting high, and gradually lowering the pitcher to create a thick layer of foam on top.
Result for Cappuccino: Light, airy foam with a distinct layer on top of the espresso, forming a 1:1:1 ratio of espresso, steamed milk, and foam.
3. Step-by-Step Guide for Foaming Milk for a Latte
1. Pour Cold Milk into a Pitcher
• Use whole milk or your preferred non-dairy milk. Fill the pitcher about one-third to halfway, similar to the cappuccino.
2. Position the Steam Wand
• Insert the steam wand just below the surface of the milk, holding the pitcher at a slight angle to create a vortex. This helps mix the air with the milk smoothly.
3. Introduce Air (Stretching the Milk)
• Turn on the steam wand and allow a small amount of air to be introduced for only 1-2 seconds. The goal for a latte is less foam, so you don’t need to stretch the milk as much as for a cappuccino.
4. Submerge the Wand (Texturising)
• After introducing air, submerge the steam wand fully in the milk and focus on texturising it. The milk should have a fine, silky microfoam with tiny bubbles, creating a smooth, glossy texture.
5. Heat the Milk to the Right Temperature
• Heat the milk to 60-65°C (140-150°F), as with the cappuccino. Avoid overheating, which can scald the milk and spoil the flavor.
6. Finish and Pour
• Tap and swirl the milk to ensure a smooth, creamy consistency. This should eliminate any large bubbles.
• Pour the milk slowly into the espresso, tilting the cup slightly and swirling the milk to integrate it with the espresso. Aim for a thin layer of foam on top.
Result for Latte: Smooth, creamy milk with a very thin layer of microfoam on top, creating a 1:3 ratio of espresso to steamed milk.
Summary of Differences:
• Cappuccino: More air is incorporated (longer stretching time), resulting in thicker foam.
• Latte: Less air is incorporated (shorter stretching time), resulting in silky, smooth microfoam.
By mastering these techniques, you’ll be able to create the perfect foam for both cappuccinos and lattes, ensuring each drink has the ideal texture and flavour balance.
-
Steaming milk for a flat white requires a delicate balance, as this drink is known for its smooth, velvety microfoam with a creamy texture, but with less foam than a latte or cappuccino. Here’s a step-by-step guide to help you steam milk perfectly for a flat white:
1. Choose the Right Milk
• Whole milk is ideal for a flat white because its fat content creates a richer, creamier texture. Non-dairy alternatives like oat or almond milk can also be used, but they may not produce the same level of creaminess.
2. Prepare the Milk
• Pour cold milk into a stainless steel milk pitcher, filling it about 1/3 full to allow room for the milk to expand slightly. The flat white requires less foam than a latte, so you don’t need as much milk expansion.
3. Purge the Steam Wand
• Before steaming, purge the steam wand by turning it on briefly to remove any water or milk residue. This ensures clean, dry steam for a smooth texture.
4. Position the Steam Wand
• Insert the steam wand just below the surface of the milk, holding the pitcher at a slight angle to create a vortex in the milk.
5. Introduce Minimal Air (Stretching the Milk)
• Turn on the steam wand fully and introduce a very small amount of air by lowering the pitcher slightly so the steam wand tip is just under the surface of the milk. You should hear a gentle hissing sound for only 1–2 seconds.
• The goal is to create a small amount of microfoam. Unlike a cappuccino or latte, a flat white has very fine foam, so you don’t want to introduce too much air.
6. Submerge the Wand (Texturising)
• After the initial stretch, submerge the steam wand deeper into the milk to stop air intake and focus on texturising the milk. You want to create a smooth, silky texture with tiny bubbles (microfoam).
• Keep the milk swirling in a vortex to break down any larger bubbles and maintain an even consistency.
7. Heat the Milk to the Right Temperature
• Heat the milk to around 48-50°C (120-125°F). Avoid overheating, as this can scald the milk and ruin the flavor.
• If you don’t have a thermometer, heat the milk until the pitcher is too hot to touch for more than a second.
8. Tap and Swirl
• Once the milk is heated, turn off the steam wand before removing it from the milk to prevent splattering.
• Tap the pitcher gently on the counter to pop any larger bubbles, then give it a swirl to keep the milk smooth and consistent.
9. Pour the Milk
• Hold the cup with your espresso ready and pour the steamed milk slowly into the center of the cup, starting from a higher position to integrate the milk with the espresso.
• As the cup fills, lower the pitcher to pour the thin microfoam on top, creating a smooth, creamy finish with minimal foam.
Final Result:
• A flat white should have a velvety texture with a thin layer of microfoam on top, covering the espresso. The ratio is typically around 1:3 (espresso to milk), with just enough foam to add creaminess without being frothy.
By following these steps, you’ll create the perfect milk texture for a flat white, with fine, silky microfoam that complements the bold espresso.

Grinder Calibration
-
Calibrating a grinder for espresso is essential to achieve the perfect extraction. Follow these steps to properly adjust your grinder:
1. Start with a clean grinder: Ensure the grinder is free of any old coffee grounds or residue for accurate results.
2. Set the grind size: Espresso requires a fine grind. Begin by setting the grinder to a fine setting, but not too fine—roughly in the middle of the espresso grind range.
3. Test the grind: Grind a small amount of coffee and brew a shot. Aim for an extraction time of 25-30 seconds for a 1-ounce shot. If the coffee pulls too fast (less than 25 seconds), the grind is too coarse; if it pulls too slowly (over 30 seconds), it’s too fine.
4. Adjust the grind: Make small adjustments based on the shot timing. Turn the grind adjustment knob finer to slow down extraction or coarser to speed it up. Adjust in small increments to avoid overcorrecting.
5. Dial in the dose: Ensure you’re using the correct coffee dose (typically 15 - 18 grams for a double shot) and tamp it evenly. Combine grind size, dose, and tamping pressure for optimal results.
6. Taste and tweak: After achieving the correct timing, taste the espresso. It should have a balanced flavor with rich crema. Fine-tune the grind if necessary to enhance the flavor profile.
Regularly re-calibrate your grinder to maintain consistent results, especially with changes in coffee beans or environment (e.g., humidity).

Group Head Cleaning
-
Backflushing a commercial espresso machine is an essential maintenance task that helps keep the group heads clean and ensures the machine continues to perform optimally. It removes coffee oils, residue, and debris from the group heads, valves, and internal parts of the machine. Here’s a step-by-step guide on how to backflush a commercial coffee machine:
1. Gather Your Supplies
• Backflush detergent (espresso machine cleaner specifically made for this purpose)
• Blind filter (blank filter): A metal filter basket without holes, typically used for backflushing
• Group brush: For cleaning around the group head
• Cloth: To wipe down any spills or clean surfaces
2. Prepare the Machine
• Turn on the machine and make sure it’s fully heated and ready to brew.
• Remove the portafilter from the group head and discard any coffee grounds.
3. Insert the Blind Filter
• Replace the regular filter basket in the portafilter with the blind filter.
• Add about 1/2 teaspoon of backflush detergent into the blind filter if you are doing a chemical backflush. If you’re doing a daily rinse without detergent, just use the blind filter alone.
4. Begin Backflushing
• Insert the portafilter with the blind filter into the group head.
• Start the brew cycle (as if pulling a shot of espresso), and let the pump run for about 10 seconds. During this time, pressure will build up behind the blind filter, then be released when the cycle stops.
• After 10 seconds, stop the machine. You’ll hear the detergent and water being flushed back into the drip tray through the three-way valve.
5. Repeat the Process
• Repeat this process 4–5 times in quick succession. Each cycle builds pressure and releases it to flush out coffee oils and residue.
• After several cycles with detergent, remove the portafilter and rinse it under hot water to remove any detergent residue.
6. Rinse Backflush
• Insert the clean blind filter back into the group head (without detergent) and run the brew cycle for 10 seconds again. Do this 3–4 times to rinse the group head and remove any remaining detergent from the system.
7. Clean the Group Head
• After backflushing, use a group brush to scrub the shower screen and the area around the group head to remove any remaining coffee residue or oils.
8. Rinse the Portafilter
• Remove the portafilter and clean it thoroughly, making sure no detergent or coffee oils remain.
9. Wipe Down and Finish
• Wipe down the group head and surrounding area with a clean cloth.
• Ensure the drip tray is clean and reassembled.
10. Daily and Weekly Routine
• Daily backflush: Do a backflush without detergent at the end of each day to keep the group heads clean.
• Weekly backflush: Perform a backflush with detergent once a week to deeply clean the group heads and valves.
Benefits of Backflushing:
• Prevents blockages in the group heads and three-way valve.
• Maintains coffee quality by removing old coffee oils and residue.
• Extends the life of the machine by keeping internal components clean and functioning properly.
By regularly backflushing your commercial coffee machine, you ensure that it runs efficiently, produces consistently high-quality coffee, and avoids costly repairs due to buildup or blockages.
